Backing Board 8x8
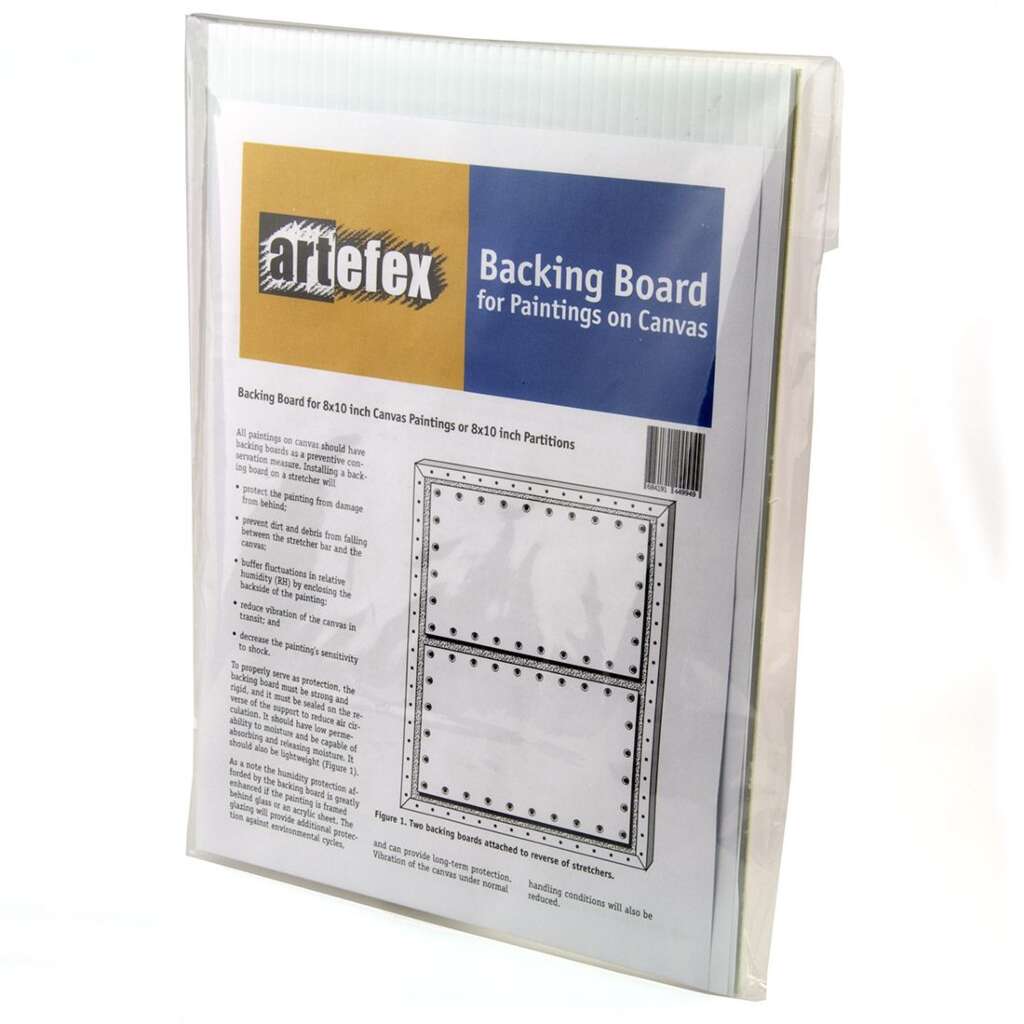
Artefex Backing Board has everything needed to protect your paintings on canvas. Included in the kit are a plastic board, pH-buffered matboard, foam stripping, and noncorrosive cup washers and screws.
All paintings on canvas should have backing boards as a preventive conservation measure. Installing a backing board on a stretcher will
• protect the painting from damage from behind;
• prevent dirt and debris from falling between the stretcher bar and the canvas;
• buffer fluctuations in relative humidity (RH) by enclosing the backside of the painting;
• reduce vibration of the canvas in transit; and
• decrease the painting’s sensitivity to shock.
To properly serve as protection, the backing board must be strong and rigid, and it must be sealed on the reverse of the support to reduce air circulation. It should have low permeability to moisture and be capable of absorbing and releasing moisture. It should also be lightweight (Figure 1).

Figure 1. Two backing boards attached to reverse of stretchers.
As a note the humidity protection afforded by the backing board is greatly enhanced if the painting is framed behind glass or an acrylic sheet. The glazing will provide additional protection against environmental cycles, and can provide long-term protection. Vibration of the canvas under normal handling conditions will also be reduced.
Included with the Artefex Backing Board
Artefex Backing Board includes everything needed to protect your paintings on canvas. In the kit are a:
• plastic board;
• pH-buffered matboard;
• foam stripping;
• stainless steel cup washers; and
• zinc-plated screws.
Backing Board is lightweight, rigid, and allows minimal moisture diffusion. The backing board consist of two pieces: The plastic board seals against short-term environmental changes (e.g., daily environmental cycles). The matboard provides additional control of the relative humidity (RH) within the space enclosed by the canvas and the backing board. This layer releases moisture as required in response to environmental conditions, thereby helping to prevent the low RH conditions that are detrimental to the paint, ground, and size layers of the painting.
Foam Stripping seals the space between the backing board and the stretcher, reducing air leakage and creating a beneficial micro-environment between the canvas back and the backing board. Ordinary weather stripping material may deteriorate and emit volatile products harmful to the materials in paintings. The foam stripping included in this kit is composed of chemically stable material that will not deteriorate and lose its sealing ability.
Tools Required
To assemle the backing board on the reverse of your canvas painting, you will need the following tools:
1. Screwdriver, Phillips head, #6;
2. Awl or other small pointed tool for piercing holes;
3. Pencil or marker; and
4. Ruler or measuring tape.
Attaching the Backing Board
The backing board—plastic board and matboard—should fit within the area of the stretcher bars as shown in Figure 2. The backing board should overlap the inner stretcher edges by at least 1.5 inches (3 cm).

Figure 2. Adhere the foam stripping to the backing board to form a seal between the backing board and the stretcher.
If necessary, you can easily cut the board with a utility knife to the required size, allowing sufficient room for the foam stripping and screws.
For large paintings, the backing board should correspond to the partitions created by the crossbar(s) of the stretcher as shown in Figure 1. Smaller sections of backing board are stiffer and will better reduce damage due to vibration and shock.
On the plastic board, mark the position of the screws at a distance of 1 inch (2.5 cm) from the edge of the board. To avoid splitting the wood of the stretcher, do not place screws closer than half inch (1 cm) to the stretcher’s edges. Space the screws at intervals of 4 inches (25 cm). Do not place screws directly over the corner joints of the stretcher.
The matboard is cut to the same size as the plastic board. Holding the two boards together, apply the foam stripping to the matboard under the markings for the holes. When the board is in place, the foam stripping should contact the wood stretcher and not the canvas folded over the back (see Figure 2).
Using an awl, make holes for the screws through both the board and the stripping. Attach the board to the stretcher with the screws and with cup washers, ensuring that there is firm and continuous contact between the foam and the support bars (Figure 3). The foam should not be tightly compressed. The two boards are held together once they are screwed to the support (Figure 3).

Figure 3. Plastic board and matboard are attached to the stretcher with wood screws and cup washers.
| SKU | 681-BB0808 |
|---|---|
| Brand | Artefex |
| Vendor | Artefex |
| Processing Time | Usually ships the next business day. |


